
Check the Wall, the Bracket, and the Room Before You Drill
Find out whether your wall can take a heavy bag mount, how to match bracket, fasteners and filled bag weight, and how to measure drop, swing room and wear.
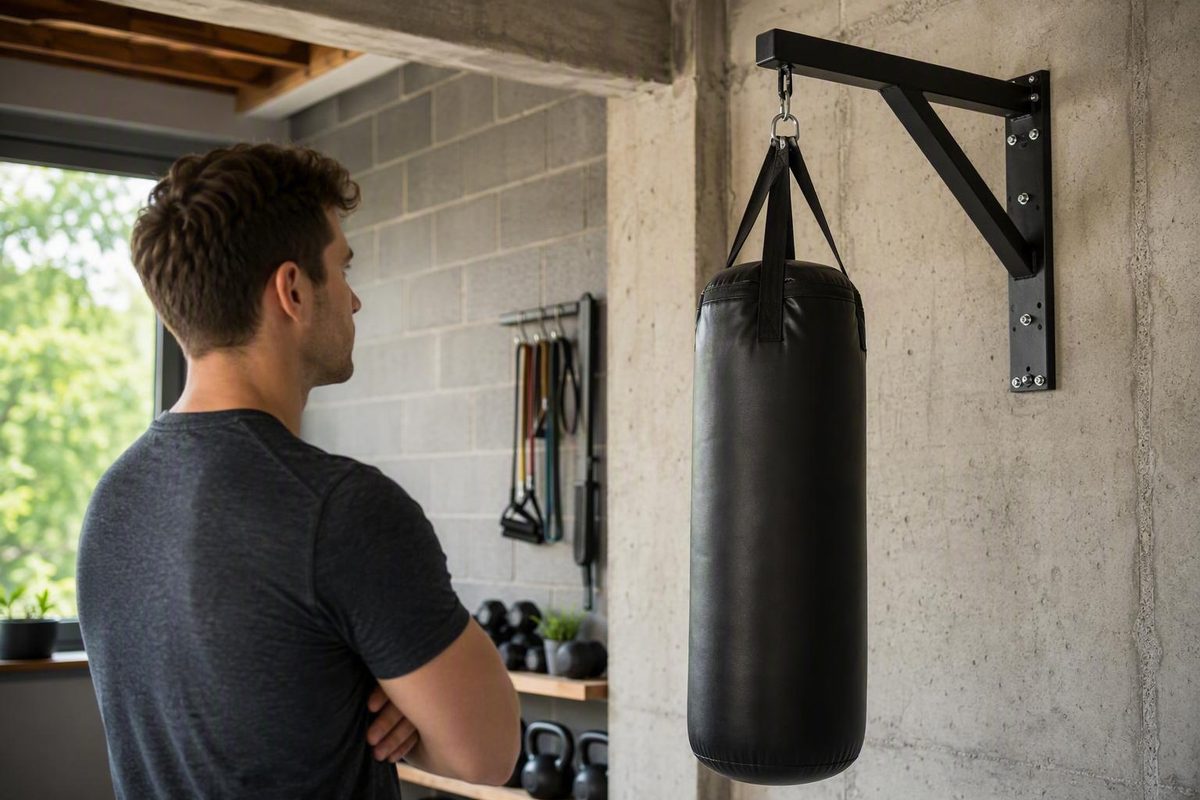
A heavy bag wall mount works only when three things are true: the bracket fastens into verified structural framing or masonry that its instructions approve, the bracket and every suspension part suit the bag’s actual filled weight, and the room leaves a clear path for the swinging bag and your footwork. If you cannot identify what is behind the wall, the product does not approve that substrate, drilling is restricted, or the bag would crowd your movement, use a stand or get an assessment from a qualified builder, structural engineer, or installer (MMA Warehouse’s installation guidance).
Settle the wall before you shop for a bracket. The order matters more than the brand.
Pick what is behind your wall, then enter the filled bag weight and the bracket’s stated limit; the verdict updates beside the inputs.
Wall Mount Go/No-Go Check
Blank fields count as unknown, not zero. Use the same unit for both weights.
Verdict
Stop: identify the structure first
Find out what is behind the finish before buying a bracket. If you cannot, use a stand or ask a builder or structural engineer to assess the wall.
Weight check: — enter both the filled bag weight and the stated limit of the bracket.
Check the hanging position (optional)
Changing units relabels the fields; it does not convert what you typed.
Wall gap: — enter projection and bag diameter. Gap at rest is the projection minus half the diameter.
Floor clearance: — enter all three lengths. Clearance is the suspension point height minus the suspension length minus the bag length.
| Behind the finish | Verdict |
|---|---|
| Unknown | Stop. Identify it, or use a stand or get an assessment. |
| Wood studs, sound | Possible, only with the wood-framing arrangement for your exact bracket. |
| Solid concrete or brick, sound | Possible, only if the instructions approve it and specify the fasteners. |
| Hollow block or metal studs | Stop unless the bracket instructions expressly cover it. |
| Drywall or plaster only | No. A finish is not structure. |
| Cracked, crumbling or water-damaged | Stop. Builder or structural engineer first. |
Sources: MMA Warehouse installation guide (substrates); Ringside HBH15 listing (150 lb when properly mounted, 28.5 in projection). A passing weight check covers the label only, not swing loads or your wall. Clearance figures are arithmetic on your own measurements; no universal clearance standard exists.
A Wall Mount Works Only When Structure, Hardware, and Room All Pass
Make the decision in this order and stop at the first failure:
- Identify the underlying structure. Do not judge it by the visible wall finish.
- Read the mount’s instructions. Confirm that the bracket approves the identified substrate and the bag’s actual filled weight.
- Map the complete training area. Include the bag’s swing and return path, then allow space for your stance, steps, pivots and exits.
- Confirm that permanent drilling is permitted. In a rented or leased property, restrictions may make a stand the more practical option (TITLE Boxing’s overview of hangers and stands).
Keep structure and convenience separate. An open garage may offer excellent training space but have an unsuitable wall. A structurally suitable wall may be in the wrong place if the bag blocks a door, strikes shelving, or forces you to stand still.
| Setup | Needs | Floor Space | Drilling |
|---|---|---|---|
| Wall mount | Approved framing or masonry behind the finish | Saves floor; wall limits movement | Yes |
| Ceiling or beam mount | Verified joist, beam, or compatible concrete | More open movement around the bag | Usually |
| Hanging stand | Stable floor; stand compatible with the filled bag | Portable; larger footprint | No |
| Freestanding bag | Level floor; correctly prepared base | Easy to move; base takes space | No |
A wall mount can leave more usable floor area, but that does not reduce its structural demands. A hanging stand avoids structural drilling and may suit a rented room or an uncertain wall, though its footprint can restrict footwork. A ceiling or beam mount is not automatically safer; it needs its own verified support point and a compatible mounting system.
Choose another setup or get qualified advice if any of these apply:
- You cannot identify the supporting structure.
- The mount does not approve the wall type.
- The filled bag exceeds the mount’s stated limit.
- Drilling is not permitted.
- The bag cannot clear the wall, fixtures, stored objects, or other people.
- The room does not allow normal boxing movement.
Drywall and Plaster Are Finishes, Not Support
Drywall, plaster, plasterboard, and decorative cladding cannot carry the bag by themselves. The load must pass through the bracket and its specified fasteners into framing or masonry approved for that particular mount (MMA Warehouse’s substrate guidance).
That does not make every concrete, brick, or stud wall suitable. Wall construction, material condition, previous damage, fastener compatibility, and the bracket’s required hole pattern all affect the installation.
A heavy bag creates a dynamic load. Its weight pulls straight down while it hangs still, but strikes make it swing, twist, and pull in changing directions. The mounting connection faces demands that the bag’s static weight does not describe, so choosing a bracket only because its advertised number exceeds the bag’s scale weight is inadequate.
Some general installation guides advise against unsupported timber-stud partitions. That does not mean every bracket prohibits wood framing: a manufacturer may specify a reinforced arrangement for a particular model. The instructions for the exact bracket control.
Stop work if you find:
- Unknown wall construction
- Hollow block or metal studs not expressly covered by the bracket instructions
- Crumbling mortar or damaged masonry
- Split, deteriorated, or water-damaged framing
- Existing movement or visible cracking
- A substrate omitted from the product instructions
- Conflicting requirements from the bracket and fastener manufacturers
Do not try to resolve uncertainty by adding generic anchors, drilling extra holes, or running an improvised pull test. Such a test cannot establish structural capacity. Ask a qualified builder or structural engineer to assess uncertain structure or damage, and use a qualified installer for product-specific installation questions.
The Bracket Rating Covers One Link in a Longer Chain
Treat the installation as a connected system:
supporting structure → fasteners → bracket → swivel or spring → connectors → chains or straps → bag attachment points → filled bag
One incompatible, damaged, or incorrectly installed component can compromise all of it. A bracket’s advertised capacity is a conditional manufacturer or seller claim, not proof that your wall and complete assembly can support a moving bag.
Record these before buying hardware:
| Item | What to Record |
|---|---|
| Bag | Model, actual filled weight, length, widest diameter |
| Bracket | Make, model, advertised capacity, projection from wall |
| Wall | Substrates the instructions approve |
| Fasteners | Required type and installation details; included or sold separately |
| Suspension | Swivel, spring or vibration component; connectors; chains or straps and their adjustment range |
| Bag attachment points | Type and condition |
| Position | Desired floor clearance; total installed hanging length |
If wall-mounting hardware is sold separately, do not substitute anchors or bolts that simply look similar. Fastener type, diameter, length, spacing, embedment, and tightening method must follow the bracket and fastener manufacturers’ requirements for the confirmed substrate.
The Ringside HBH15 shows why model-specific details matter. Ringside claims support for a bag weighing up to 150 pounds when properly mounted and states that the hanger projects 28.5 inches from the wall. Its wood-stud arrangement calls for plywood and fastening the upper bracket into two studs, concrete has a different arrangement, and wall-mounting hardware is not included (Ringside HBH15 specifications). Those details apply to that model, not to another bracket that looks similar.
Promountings advertises a wall mount for bags weighing up to 200 pounds and describes a compression-spring system intended to reduce vibration. The product listing does not state compatible wall types or required fasteners, so those claims alone do not establish installation compatibility (Promountings wall-mount listing).
General bag-selection rules, including recommendations based on a boxer’s body weight, do not determine bracket or wall capacity. Work from the bag’s actual filled weight and the requirements of the complete mounting system.
Measure the Full Drop and the Bag’s Reach Before Marking Holes
The bag’s vertical position depends on the whole assembled drop, not the bag alone. From the top down, measure:
- Bracket suspension point
- Swivel, spring, or vibration component
- Approved connectors
- Chains or straps
- Bag length
- Intended clearance below the bag
Floor clearance equals the height of the bracket’s suspension point minus the total suspension length minus the bag length. Measuring only the bag can leave it too high, too low, or unexpectedly close to the floor once the suspension is assembled. The optional section of the checker above does this sum with your measurements.
Then plan the horizontal space:
- Mark the bracket’s projection from the wall.
- Add half the bag’s diameter to locate its outer surface. The gap between the resting bag and the wall is the projection minus half the diameter.
- Allow for the swing and return path.
- Check for doors, windows, shelves, lighting, and garage tracks.
- Account for vehicles, stored equipment, and other room users.
- Reserve room for your approach, lateral movement, pivots, and exits.
There is no universal bracket height or clearance radius. Athlete height, bag design, suspension length, intended striking zone, planned drills, and room layout all matter. One commercial guide suggests a 60–70 cm bracket projection and positioning the bracket above the bag, but those figures are that source’s rules of thumb rather than universal safety requirements (Snekkerbuks’ placement guidance).
Before drilling, mark the proposed bag center on the floor and box around it:
- Take your normal stance.
- Step left and right without crossing your feet.
- Pivot in both directions.
- Circle the proposed bag position.
- Enter behind a jab.
- Throw a short combination without reaching.
- Exit as though the bag were returning toward you.
If any of those feels cramped with nothing hanging there, it will be worse with a bag swinging back at you.
Install to the Confirmed Substrate and the Bracket Instructions
There is no universal fastening recipe for a heavy bag wall mount, and only the configuration approved for the selected bracket should be used. Once the product and supporting structure are confirmed, the sequence is:
- Read the instructions for the bag, bracket, fasteners, connectors, and suspension components.
- Verify the supporting structure and inspect its condition.
- Check the drilling area for concealed electrical cables, plumbing, or other services.
- Confirm the bracket position against your hanging-length measurements and movement plan.
- Level the bracket and mark the manufacturer’s required hole pattern.
- Drill with the specified tool and bit for the confirmed substrate.
- Remove drilling dust where the fastener instructions require it.
- Install the specified fasteners using the prescribed spacing, embedment, and tightening method.
- Attach compatible suspension components and secure each connector as directed.
- Hang the bag with lifting assistance.
Typical tools include a tape measure, pencil, spirit level, a detector appropriate to the wall, a drill or hammer drill where specified, the correct bit, and a suitable socket or spanner. Wear eye protection while drilling, investigate concealed services before making holes, and get help rather than lifting and connecting a heavy bag alone (Fight Co’s installation precautions).
A swivel allows the bag to rotate and may reduce twisting stress on the suspension hardware.
Stop instead of improvising if the instructions conflict, framing cannot be confirmed, a detector indicates possible services near the holes, the wall type is not approved, the prescribed hole pattern cannot be followed, or any connector does not fit and close as its manufacturer requires.
Light Strikes First, Then Build Up
Before hitting a newly installed bag:
- Inspect the bracket, fixings, and surrounding wall.
- Confirm that the bracket sits flush as designed.
- Check that connectors are fully closed and secured.
- Examine the chains or straps and the bag’s attachment points.
- Move the bag slowly by hand through its intended path.
- Remove breakable objects and keep other people outside that path.
- Confirm that the bag cannot hit the wall, ceiling, lights, doors, or stored equipment.
Begin with light, controlled strikes while watching the wall, bracket, suspension, and bag path. Stop immediately if the bracket shifts, hardware loosens, the wall cracks, the suspension wobbles, a component begins to detach, the bag hits an object, or a new creak, knock, or scraping sound appears. Gradual testing may reveal obvious defects, but it cannot certify the wall’s structural capacity.
Once the installation has been verified, a beginner can start with a controlled jab round rather than full-power combinations. Keep a balanced stance, aim for sharp contact instead of heaving the bag, and return the lead hand promptly to the cheekbone. Written guidance does not replace a boxing coach or proper protective equipment.
What to Check Before Every Session
Look for:
- Bracket movement when lightly checked by hand
- Loose fasteners or fixings backing out
- New cracks, crushed finishes, or gaps around the bracket
- Connectors that are open or incorrectly oriented
- Damaged bag loops, rings, or attachment points
- Cut, worn, or frayed straps
- Distorted or excessively worn chains
- Rust, bending, or cracking on metal parts
- A swivel that no longer moves as intended
- New or unexplained sounds
At recurring intervals, inspect the anchors and fixings, bracket alignment, surrounding structure, swivel, connectors, chains or straps, and every bag attachment point more closely. Follow the inspection and maintenance schedule supplied by each component manufacturer. Fight Co suggests a more detailed monthly check as general retailer guidance, but that interval does not override product-specific instructions or the need to inspect immediately when something changes (Fight Co’s maintenance checklist).
Stop training for movement at the mounting point, looseness, partial detachment, cracking, bent or rusted connectors, frayed suspension, damaged bag attachments, or an unexplained new sound.
| Mistake | Why It Fails | Do This Instead |
|---|---|---|
| Attaching to drywall alone | The finish is not the supporting structure | Locate verified framing or approved masonry |
| Shopping by bag weight alone | Ignores the wall, fasteners, and dynamic movement | Check the complete system |
| Hanging the bag in a cramped corner | Restricts swing, stance, and footwork | Map bag and boxer movement first |
| Using generic hardware | Similar appearance does not establish compatibility | Use manufacturer-specified fasteners |
| Starting at full power | Obvious defects may not have shown yet | Inspect, then test with controlled strikes |
| Ignoring small changes | Movement, noise, or wear can precede failure | Stop and inspect the whole assembly |
A mount that passes all of this still has to leave you room to box. If the only verified wall puts the bag where you can do nothing but stand and punch, a stand in open floor space is the better training setup.