
Build a Balanced Thai Boxing Base That Moves With You
Set your feet shoulder-width apart, soften the knees and keep weight near even, then use short steps that preserve balance for strikes, checks and defense.
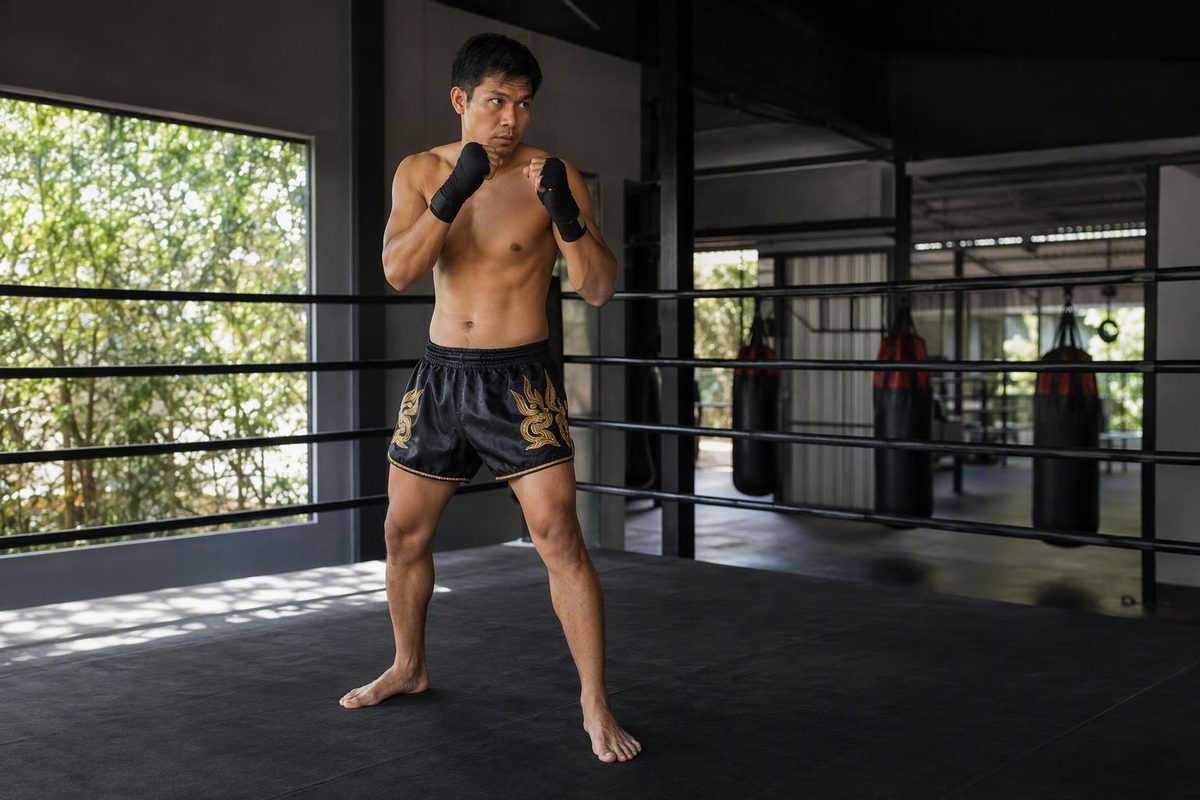
A sound Muay Thai fighting stance is an adaptable home base, not a pose you freeze in. Place one foot forward, set the feet around shoulder-width apart, soften the knees, keep the torso upright, raise the guard, and begin with your weight close to even. From there, use short steps and controlled shifts so you can punch, kick, check, clinch, or defend without first rebuilding your feet.
The beginner stance: a seven-point setup
Use these seven points to establish a neutral stance before adding movement or strikes.
-
Choose a lead side. In an orthodox stance, the left foot leads. In southpaw, the right foot leads. Many beginners start with their stronger hand and leg at the rear, but this is a convention rather than a rule dictated by handedness.
-
Set the feet. Place them approximately shoulder-width to slightly wider than shoulder-width, with one foot ahead of the other. Avoid putting both feet on one narrow line as though standing on a tightrope. The rear foot can turn outward naturally, but no single angle suits every fighter or coaching system.
-
Soften the knees. Bend both knees slightly instead of locking the legs. Keep the torso upright and the shoulders relaxed. Avoid leaning heavily over the lead leg or sitting excessively over the rear hip.
-
Face relatively square. Present more of the hips and torso toward the opponent than you would in a heavily bladed boxing stance. “Relatively square” is the important qualification: the precise orientation changes with the fighter, coach, range, and intended technique. It does not mean forcing the hips perfectly square at all times.
-
Build the guard. Keep both hands high, tuck the chin modestly, and control the elbows near the torso. The rear hand usually stays close to the face while the lead hand can sit slightly farther forward. Palm orientation, exact hand height, and elbow width vary among instructors; ONE Championship’s beginner stance guide offers one commonly taught version.
-
Center the weight. Start close to evenly distributed so you can lift either foot without a large preparatory sway. Coaches sometimes describe this as 50/50 or use a rear-weighted cue such as 40/60. These percentages are coaching frameworks, not scientifically validated requirements, and they may change with the technique being prepared or performed, as illustrated by the Iron Strong Academy stance framework.
-
Run a functional self-check. You should be able to hold the stance without swaying, lift either foot briefly, step in any direction, and return both hands to guard. If one of those tests fails, adjust the width, length, tension, or weight placement before worrying about precise angles.
The visual shape matters less than what the position permits. Your stance is ready when it supports immediate movement, defense, and offense without a preliminary shuffle.
Orthodox or southpaw: mirror the stance, not the instructions
The two basic setups are direct mirrors:
- Orthodox: left foot and left hand lead; right foot and right hand are rearward.
- Southpaw: right foot and right hand lead; left foot and left hand are rearward.
The same structural instructions apply to both. Keep the feet offset, knees soft, torso upright, guard high, and weight movable. When a drill says “lead foot,” it means the left foot for an orthodox fighter and the right foot for a southpaw. “Rear hand” means the right hand in orthodox and the left hand in southpaw.
Putting the stronger side at the rear is a common starting convention associated with developing rear-side attacks. It is not an absolute rule. A right-handed fighter can use southpaw, and a left-handed fighter can use orthodox.
Do not choose a stance only because one punch feels more natural. Test the complete position by stepping, retreating, checking, teeping, striking from the rear side, guarding, and responding to attacks. In one practitioner discussion, a right-handed fighter reported more natural offense and balance in southpaw but stronger defense in orthodox; that is anecdotal rather than general evidence, but it illustrates why both offense and defense should be assessed with a qualified coach (8LimbsUs discussion).
This guide uses a conservative progression: establish one reliable primary stance before making frequent stance switching a tactical skill. Coaches differ on when opposite-stance training should begin, so the decision should reflect your coordination, defensive control, and training goals.
Why the stance is more square than a boxing stance
A boxing stance is organized around punches and defenses against punches. Muay Thai must also accommodate kicks, kick checks, knees, elbows, sweeps, and clinch exchanges. A heavily bladed boxing stance therefore should not be transferred without adjustment.
The opposite extreme has costs. Useful orientation changes with range, style, intended technique, and opponent; neither boxers nor Muay Thai fighters use one uniform angle.
| Feature | Boxing tendency—not a universal rule | Muay Thai tendency—not a universal rule |
|---|---|---|
| Body angle | More bladed | More square |
| Lead-leg availability | Often organized around punching movement | Kept available for checks, teeps, and kicks |
| Guard | Shaped primarily around punches | Must also accommodate kicks, elbows, knees, and clinch entries |
| Movement priorities | Punching range, angles, and head movement | Multi-range striking, checking, balance, and clinch access |
Think in terms of demands rather than appearance. If your stance works for punching but requires you to reorganize before every check or kick, it has not yet become a complete Thai boxing base.
Move without dismantling your base
The central footwork rule is simple: the foot nearest the destination moves first; the other foot follows to restore the original spacing.
Moving forward
Step with the lead foot first. Let the rear foot follow by roughly the same distance. Do not stretch the stance into a lunge or bring the rear foot so far forward that the feet nearly meet.
Moving backward
Move the rear foot first, then recover the lead foot. Moving the lead foot backward first tends to narrow or cross the stance.
Moving sideways
Move the foot on the destination side first:
- Moving left: left foot first.
- Moving right: right foot first.
Bring the other foot across only far enough to restore the base. Do not cross the legs or click the feet together. This destination-side-first approach is also described in the NOW Muay Thai beginner guide.
Favor short, calculated steps over hops and long lunges. A step is complete when the feet have recovered and you can immediately guard, strike, or check—not merely when you have reached a new location.
Basic pivot
Turn under control on the ball of the lead foot while the rear foot repositions around it. Keep the knees soft and the head centered over the base. There is no universal pivot angle: turn only as far as you can while preserving posture, balance, and guard.
Adjust the stance to the technique
The neutral stance organizes you between actions. It does not need to look unchanged throughout every exchange. Width, orientation, and weight placement can shift when the adjustment serves the technique and leaves you able to recover.
| Situation | Useful adjustment | Trade-off |
|---|---|---|
| General movement and transitions | Roughly shoulder-width base; weight near even | Versatile but not specialized for one action |
| Lead teep or lead-leg check | Modest shift toward the rear leg | Lead leg lifts more readily; excessive rear weighting can limit movement |
| Committed punches or low kicks | Slightly wider or more planted base | Greater commitment may slow the next step |
| Close range and clinch | More square or parallel; stability prioritized | Less emphasis on long-range mobility |
For a lead teep or check, a modest rearward shift can unload the lead leg. Keep the adjustment small enough that you can still move rather than becoming fixed over the rear hip.
Some coaches use a wider or more planted base for committed punching and low kicking. The useful limit is reached when the stance becomes so long or wide that recovery requires an extra step. At close range or in the clinch, fighters may adopt a more parallel, square position because stability and resistance to off-balancing take priority over long-range movement.
Labels such as 50/50, 40/60, and 60/40 can help a coach communicate where the weight should feel. They are not universal biomechanical standards. One coaching model distinguishes centered, wider, shorter, rear-weighted, front-weighted, and clinch-oriented positions according to range and intended technique; it should be treated as an adaptable framework rather than a mandatory system (Iron Strong Academy).
Judge any adjustment by whether it leaves you organized afterward. A technique should not strand your weight or force a scramble before the next action.
Diagnose the fault by what happens next
Do not judge a stance only from a still image. Watch what happens while you move and immediately afterward.
| Error or symptom | Likely issue to test | Correction |
|---|---|---|
| Feet cross or meet during retreat | Step is too long or lead foot moves first | Shorten the step; rehearse rear foot first |
| Balance disappears after a strike or check | Action exceeds the base or recovery is incomplete | Reduce range or force; replace the moving foot before continuing |
| Either leg is hard to lift | Weight is trapped or knees are rigid | Center the weight and soften both knees |
| One direction requires rearranging first | Stance is excessively wide or long | Reduce the base until every direction is available |
| Guard drops while stepping | Attention is isolated on the feet | Slow down; retain hand, chin, and elbow positions |
| Lead-leg check feels delayed | Stance may be too bladed or front-heavy | Test a squarer angle or less forward commitment |
| Whole body feels rigid | Shoulders or knees are braced | Relax them while maintaining posture and guard |
These are diagnostic possibilities, not guaranteed causes. A delayed check might reflect stance angle or weight placement, but it can also come from timing or unfamiliarity. Change one variable at a time so you can identify what actually improves the movement.
Balanced and relaxed does not mean loose or unguarded. Keep enough structure to maintain posture and cover the body, but avoid unnecessary tension. The shoulders should not rise toward the ears, and the knees should not lock between actions.
If recovery fails after a strike, reduce the speed, range, or force. Replace the moving foot in relation to the other foot, restore the guard, and then continue.
A progressive stance-and-footwork practice routine
Use this 15-minute routine to turn the stance from a memorized position into a moving base. Work slowly enough to notice errors.
Minutes 0–3: static mirror check
Set your orthodox or southpaw stance in front of a mirror.
- Check the width and front-to-back spacing of the feet.
- Soften both knees.
- Keep the torso upright and shoulders relaxed.
- Set the chin, hands, and elbows.
- Lift the lead foot briefly and reset it.
- Lift the rear foot briefly and reset it.
If either lift requires a visible sway, recenter your weight or reduce the stance dimensions.
Minutes 3–7: four-direction stepping
Take one short step forward, pause, and check the stance. Repeat backward, left, and right.
After every repetition, ask:
- Are my feet still separated?
- Is one foot still clearly leading?
- Are my knees soft?
- Is my guard in place?
- Could I lift either leg now?
Move the destination-side foot first. The second foot restores the stance rather than creating another advance.
Minutes 7–10: pivots and resets
Pivot on the ball of the lead foot while repositioning the rear foot. Pause after every turn. Check that your head remains over the base and that your hands have not spread or dropped.
Practice both turning directions, but stay within a range you can control. A smaller balanced pivot is more useful than a larger turn that breaks posture.
Minutes 10–13: moving shadowboxing
Add one action at a time:
- Step and jab.
- Step and cross.
- Lead-teep motion.
- Round-kick motion.
- Lead-leg check.
Use controlled speed and stop after each action. Replace the striking or checking leg, rebuild the guard, and confirm your balance before continuing. Do not turn the drill into a fast combination round yet.
Minutes 13–15: cue-and-reset audit
Use random imagined directions, or have a coach call “forward,” “back,” “left,” “right,” or “pivot.” Respond with:
- The correct first foot.
- A guard response, such as a high cover or check.
- A complete stance reset.
If a cue forces a preliminary shuffle, the stance may be too committed in one direction. If the feet recover but the hands do not, slow down and treat guard recovery as part of the movement.
Once you can retain balance and guard during solo movement, introduce bag work and then supervised partner drills as appropriate to your training environment. Muay Thai involves contact and striking practice, so use qualified coaching and suitable equipment. Written instruction is not individualized medical advice; if pain or mobility limitations affect your training, seek appropriate professional advice before continuing.
Frequently asked questions
Should a beginner practice switching between orthodox and southpaw?
One reasonable progression is to build a reliable primary stance first. That lets a beginner coordinate footwork, guard, strikes, checks, and defensive reactions from a consistent base. Limited opposite-stance practice can then expose asymmetries and help the student recover when a missed strike or off-line step produces an unintended switch.
Coaches do not all take the same approach. Don Heatrick advocates deliberate opposite-stance bag practice so fighters can remain functional after switching and develop additional tactical options. His proficiency targets and proposed benefits are coaching recommendations rather than established performance thresholds (opposite-stance training guide).
Whichever progression you use, switching should be intentional. An unfamiliar stance changes attack and defensive angles, so the ability to throw from it should not be mistaken for complete defensive competence.
Is there one traditional Muay Thai stance?
No. There is a useful modern beginner baseline, but not one immutable traditional stance. Historical and regional systems describe different foot positions, guards, and tactical priorities, while modern sport fighters adjust their stance according to range, style, and technique.
One traditional account describes one-point, two-point or square, and three-point or triangle support positions, alongside regional variations associated with different defensive and offensive approaches. That taxonomy provides historical and technical context; it does not establish a posture every modern beginner must copy (traditional Muay and Muay Boran overview).
A practical student should learn the gym’s neutral base, understand which elements remain consistent, and then adapt width, angle, guard, and weight placement under coaching.
The final test
A useful Muay Thai stance lets you move, guard, strike, check, and recover without first rebuilding your feet. Establish the neutral baseline, pressure-test it with short steps and controlled drills, and let a qualified coach adjust the variable details for your body, style, and training context.